Specialisation - Procedural level generation with decoration in Unreal Engine 4
Specialisation is a school period in which students do a self motivated project for a half year. For my project I wanted to find out if it was possible to create a visually appealing indoor procedural level. The end result is a single blueprint which after it is placed in the scene creates the following:
|
|
Below a short status of the project for when I want to go further than the delivery requirements (which I do).
Project Status: - Mesh: Placeholder - Texture/Material: Not done - Lighting: Not done - Variety room (decoration): 5 different rooms |
Explanation of the blueprint
The blueprint can currently be divided into three sections:
- base
- room system
- decoration system
Base
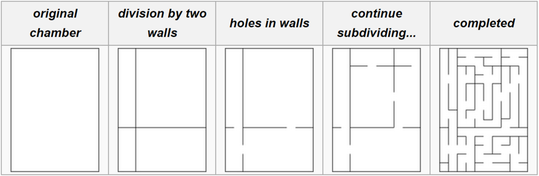
The base is constructed out of a maze algorithm, which is recursive division. Recursive division is dividing a space horizontally and vertically and then creating an opening in the division. The following image gives a simple explanation (image taken from Wikipedia).
|
|
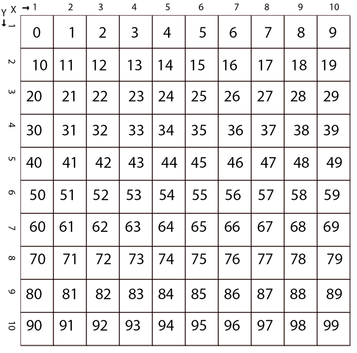
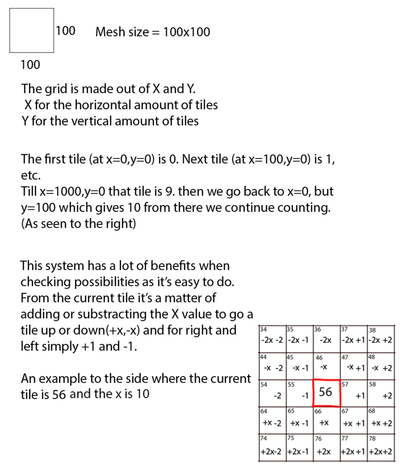
For my project I adjusted the algorithm so that it didn't create openings in the division and stopped when the new 'chambers' were a certain size (room size). In the end the walls created are in fact the hallways (as these will then always be connected to all the rooms (chambers). Finally to allow for exact placement of meshes I used a tiling system. By creating a grid of tiles where each tile gets it own numbers, this number in turn can be used to know the location of the tile. I have to thank Michael Pattison for this method, as he explained it in his tutorial. Below an explanation through images.
|
|
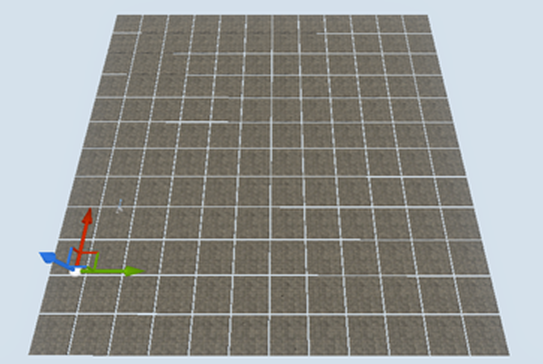
As seen in UE4, the gaps between the tiles is done intentionally to visualize the tiles.
|
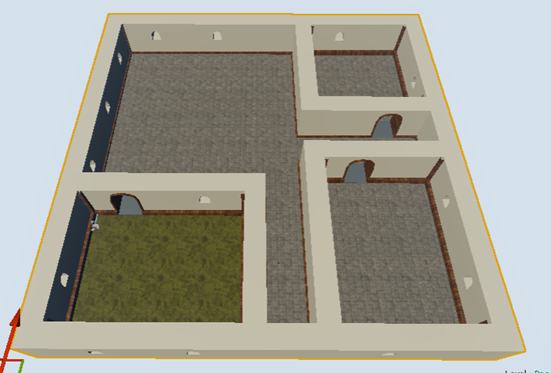
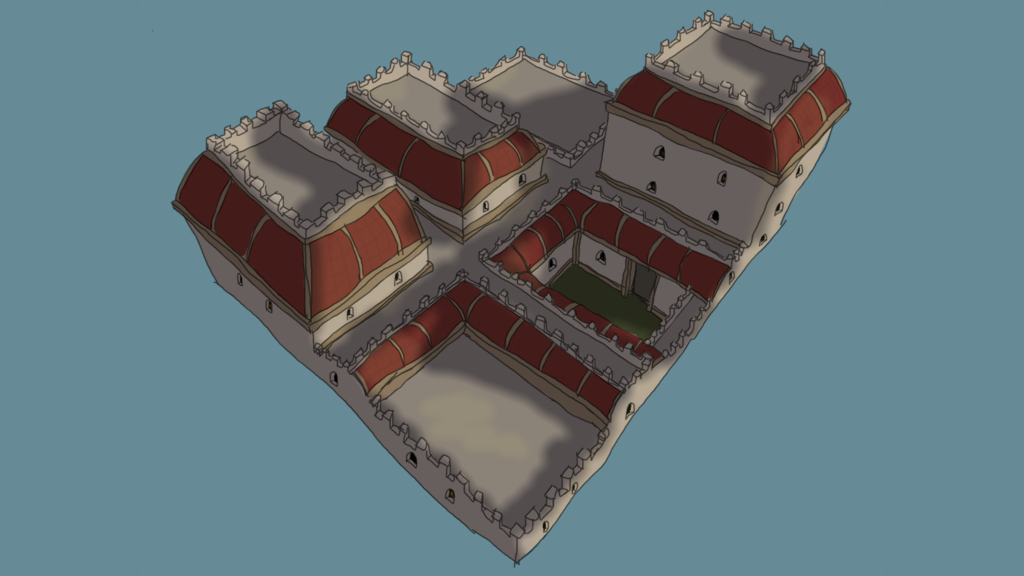
Room System
The division assigned the tiles into either hallway or room tiles. Each cluster of room tiles formed its own room, which then was given a function. This could either be a normal room, an 'openhall' or a courtyard. The normal rooms is literally a normal room (enclosed with walls), the 'openhall' is an opening in the hallway and finally the courtyard is actually a courtyard (also enclosed with walls). The normal room has a possibility to have a higher ceiling (depending on the settings) and is the only room with that possibility.Due to the courtyard an exterior look was required, a concept (paintover) is visible below. Lastly the ceiling system was made, this is currently the same type of ceiling for the normal rooms. The openhalls share their ceiling with the hallway.
|
|
Decoration System
Finally each room was given a function based on their previous function. Currently the following possibilities can happen:
Normal room:
- Bedroom
- Kitchen
- Storage
Openhall:
- Sitting area
Courtyard:
- Courtyard (with either a tree, a fountain or a well)
According to each function I set the blueprint to first place the core elements (such as a bed in a bedroom), then extra decoration (such as a desk in a bedroom) and finally overall decoration (such as paintings).
The hallways are also given decoration by means of torches, these are firstly placed next to doors and at the end of hallways and then if possible in between (with a set space between torches).
Again all meshes are placeholders and either only show the function of the final object or merely even size of a final object.
Below some screenshots of the end product
...
